PHP環境

UbuntuのPHP+NginxでリモートなXdebug (4) リモートデバッグ
0サーバ上のPHPコードにアクセスできるようになったので、ローカルのEclipseでPHPプロジェクトを作ります。
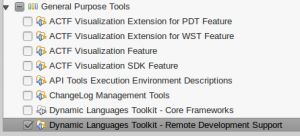
「Install New Software」で「Luna – http://download.eclipse.org/releases/luna」を選択し、「General Purpose Tools」の「Dynamic Language Toolkit – Remote Development Support」をインストールします。
インストール後、Eclipseが再起動したらサーバのディレクトリにEclipseのPHPプロジェクトを作ります。
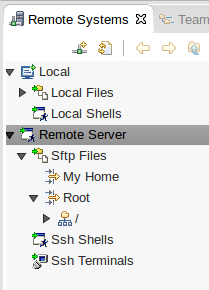
Remote System Explorerのパースペクティブを開き、Remote SystemsビューのSftp Filesからプロジェクトに設定するディレクトリを右クリック。Create Remote Projectを選択します。
ここでは/usr/share/nginx/htmlを選択しました。
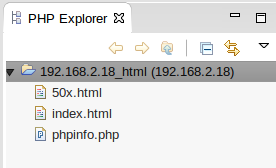
PHPパースペクティブを開くと、新しいプロジェクトが出来ています。
最後にEclipseのXdebug設定です。
「Run→Debug Configurations」で設定ダイアログを開き、PHP Web Applicationを選択してNew launch configurationのアイコンをクリックします。
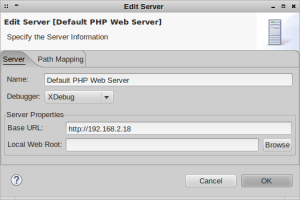
ServerパネルのConfigureボタンをクリックしてサーバ設定ダイアログを開き、DebuggerにXDebug、Base URLにサーバのURLを設定します。
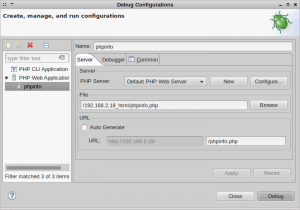
ServerタブのFileに、実行するPHPファイルのワークスペース内のパス(この場合は/192.168.2.18_html/phpinfo.php)を設定、URLのAuto Generateのチェックを外してURLのファイルパスにサーバのドキュメントルートからの相対パスを設定します。
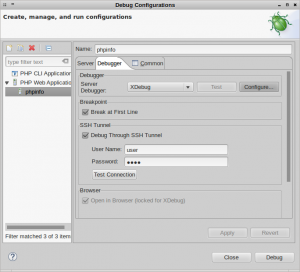
DebuggerタブのServer DebuggerでXDebugを選択、Debug Through SSH Tunnelにチェックを入れてUserとPasswordを設定します。
以上で設定は完了です。
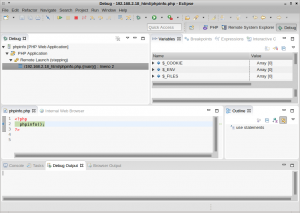
Apply、Debugの順にクリックしてデバッグを開始します。
デフォルトではコードの最初の行で自動的にブレークします。

UbuntuのPHP+NginxでリモートなXdebug (3) Eclipse+RSEでサーバにアクセス
0前の記事まででサーバ側の準備ができました。
あとはサーバにXdebugで接続すればリモートデバッグできるのですが、サーバとローカルのコードを同期させなくてはならなかったりして微妙に面倒です。「ここまで出来るんなら、もう少し何とかしてくれていいのではないか?」という不満が残りますね。
そこで、EclipseとRSE(Remote System Explorer)プラグインを使って、サーバ上のPHPコードにローカルのEclipseからアクセスできるようにしましょう。
ここでは、Eclipse4.4(Lunar)PDTにRSE3.5プラグインを追加する例を示します。
Eclipseはとにかくインストール済みとします。
あらかじめサーバのドキュメントルートのパーミッションを適宜設定しておいてください(chown -Rでwww-data:www-dataにして、ユーザの初期グループをwww-dataにしておくとか)。
RSEはEclipseのTarget Managementリポジトリにあります。
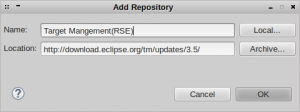
「Help→Install New Software」を開き、「Add」で「Add Repository」ダイアログを開きます。
Locationに「http://download.eclipse.org/tm/updates/3.5」と入力します。Nameは適当で構いません。
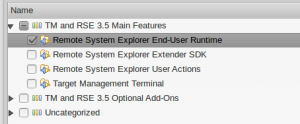
OKしてしばらく待つと、パッケージのリストが表示されます。
「Remote SystemExplorer End-User Runtime」を選択してインストールを実行します。
インストール完了後、Eclipseを再起動すると、パースペクティブに「Remote System Explorer」が追加されています。
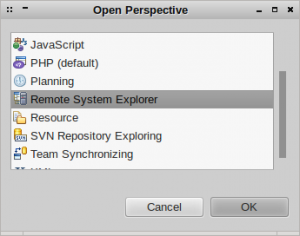
パースペクティブを開き、左側の「Remote Systems」ビューで右クリック。「New→Connection」で新しい接続を追加します。
ここではSSHで接続することにします。
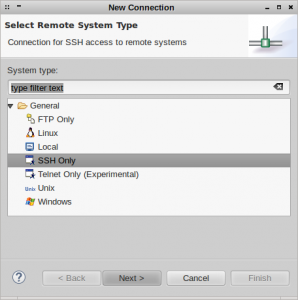
続くダイアログでホスト名を入力してFinishすると、Remote Systemsビューにホスト名が追加されます。
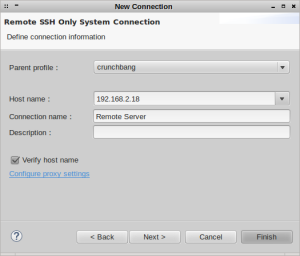
これでローカルのEclipseからサーバ上のファイルを編集したり、SSHログインできるようになりました。

UbuntuのPHP+NginxでリモートなXdebug (2) Xdebugインストール
0まずはPECLを使うためにphp5-devをインストールします。
binutilやら何やらも必要になるので、-yオプションを付けて一気に済ませてしまいましょう。
$ sudo apt-get install -y php5-dev
次に、PECLでXdebugをインストール。
$ sudo pecl install xdebug
aptでphp5-xdebugを入れても良いのですが、私はより新しいバージョンを使うためにPECLからのインストールを選択しました。aptで入れればbinutilなどのリソースを省けるので、どちらを選ぶかはお好みで。
2016/01/08 追記 ubuntu14.04では、-Zオプションが必要です。
$ sudo pecl install -Z xdebug
Xdebugをインストールしたら/etc/php5/mods-available/xdebug.iniを作成します。
|
1 2 3 |
zend_debuger=xdebug.so xdebug.remote_enable=On xdebug.remote_connect_back=On |
xdebug.remote_connect_back=OnはすべてのホストからサーバのXdebugに接続できるようにします。
リモートデバッグするホストを特定の1台に限る場合は、代わりにxdebug.remote_host="nnn.nnn.nnn.nnn"と記述しておくと安全です。
FPM経由でXdebugを有効にするため、/etc/php5/fpm/conf.d/20-xdebug.iniからリンクを張ります。
$ sudo ln -s /etc/php5/mods-available/xdebug.ini /etc/php5/fpm/conf.d/20-xdebug.ini
設定は以上です。FPMを再起動します。
$ sudo service php5-fpm restart
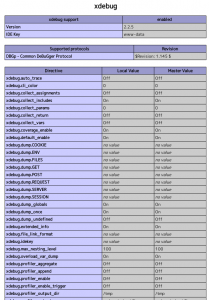
ブラウザでphpinfo.phpを開き、Xdebugが有効になっていれば設定は完了です。

UbuntuのPHP+NginxでリモートなXdebug (1) Nginx PHP対応
0ローカルPCのEclipseからサーバ上のPHPをリモートデバッグします。
PHP環境はすべてサーバ側に置き、ローカルはEclipseとプラグインだけにして軽量化、PHPコードもサーバ上だけに一元化します。
UbuntuのバージョンはServer14.04。PHP5とNginxはaptでインストール済みとします。サーバーのIPアドレスはstaticです。
まずはFPM(FastCGI Process Manager)をインストールします。
$ sudo apt-get install -y php5-fpm
NginxをPHPに対応させるため、/etc/nginx/sites-available/defaultを編集します。
変更は3ヶ所。インデックスファイル名追加とサーバー名設定、それからコメントアウトされているPHPの設定を有効に。
|
1 2 3 4 5 6 7 8 9 10 11 12 13 14 15 16 17 18 19 20 21 22 23 24 25 26 27 28 29 30 31 32 33 34 35 36 37 38 39 40 41 42 43 44 |
--- /etc/nginx/sites-available/default.org 2014-07-21 15:20:37.320471527 +0900 +++ /etc/nginx/sites-available/default 2014-07-21 16:18:24.240252118 +0900 @@ -22,10 +22,10 @@ listen [::]:80 default_server ipv6only=on; root /usr/share/nginx/html; - index index.html index.htm; + index index.php index.html index.htm; # Make site accessible from http://localhost/ - server_name localhost; + server_name 192.168.2.18; location / { # First attempt to serve request as file, then @@ -51,17 +51,17 @@ # pass the PHP scripts to FastCGI server listening on 127.0.0.1:9000 # - #location ~ \.php$ { - # fastcgi_split_path_info ^(.+\.php)(/.+)$; - # # NOTE: You should have "cgi.fix_pathinfo = 0;" in php.ini - # - # # With php5-cgi alone: - # fastcgi_pass 127.0.0.1:9000; - # # With php5-fpm: - # fastcgi_pass unix:/var/run/php5-fpm.sock; - # fastcgi_index index.php; - # include fastcgi_params; - #} + location ~ \.php$ { + fastcgi_split_path_info ^(.+\.php)(/.+)$; + # NOTE: You should have "cgi.fix_pathinfo = 0;" in php.ini + + # With php5-cgi alone: + #fastcgi_pass 127.0.0.1:9000; + # With php5-fpm: + fastcgi_pass unix:/var/run/php5-fpm.sock; + fastcgi_index index.php; + include fastcgi_params; + } # deny access to .htaccess files, if Apache's document root # concurs with nginx's one |
server_nameにはサーバーのホスト名かIPアドレスを設定します。ここではひとまずIPアドレスで良いでしょう。この例では192.168.2.18です。
コメント中に「php.iniに”cgi.fix_pathinfo = 0;”と書け」とあるのでそのようにします。
|
1 2 3 4 5 6 7 8 9 10 11 |
--- /etc/php5/fpm/php.ini.org 2014-07-21 16:16:42.932251102 +0900 +++ /etc/php5/fpm/php.ini 2014-07-21 16:17:02.096251294 +0900 @@ -765,7 +765,7 @@ ; of zero causes PHP to behave as before. Default is 1. You should fix your scripts ; to use SCRIPT_FILENAME rather than PATH_TRANSLATED. ; http://php.net/cgi.fix-pathinfo -;cgi.fix_pathinfo=1 +cgi.fix_pathinfo=0 ; FastCGI under IIS (on WINNT based OS) supports the ability to impersonate ; security tokens of the calling client. This allows IIS to define the |
設定確認のためのphpinfo.phpをNginxのドキュメントルート/usr/share/nginx/htmlに置きます。
|
1 2 3 |
<?php phpinfo(); ?> |
設定が済んだらNginxとFPMを再起動します。
$ sudo service php5-fpm restart

$ sudo service nginx restart
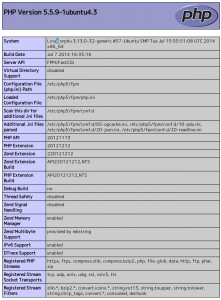
ブラウザでhttp://hostname/phpinfo.phpを開き、下のような画面が表示されれば設定は完了です。
